mirror of
https://github.com/formbricks/formbricks.git
synced 2026-02-28 01:09:27 -06:00
209 lines
8.3 KiB
Plaintext
209 lines
8.3 KiB
Plaintext
---
|
|
title: OAuth
|
|
description: "OAuth for Formbricks"
|
|
icon: "key"
|
|
---
|
|
|
|
<Note>
|
|
Single Sign-On (SSO) functionality, including OAuth integrations with Google, Microsoft Entra ID, Github and OpenID Connect, requires a valid Formbricks Enterprise License.
|
|
</Note>
|
|
|
|
### Google OAuth
|
|
|
|
Integrating Google OAuth with your Formbricks instance allows users to log in using their Google credentials, ensuring a secure and streamlined user experience. This guide will walk you through the process of setting up Google OAuth for your Formbricks instance.
|
|
|
|
#### Requirements:
|
|
|
|
- A Google Cloud Platform (GCP) account.
|
|
|
|
- A Formbricks instance running and accessible.
|
|
|
|
#### Steps:
|
|
|
|
1. **Create a GCP Project**:
|
|
|
|
- Navigate to the [GCP Console](https://console.cloud.google.com/).
|
|
|
|
- From the projects list, select a project or create a new one.
|
|
|
|
2. **Setting up OAuth 2.0**:
|
|
|
|
- If the **APIs & services** page isn't already open, open the console left side menu and select **APIs & services**.
|
|
|
|
- On the left, click **Credentials**.
|
|
|
|
- Click **Create Credentials**, then select **OAuth client ID**.
|
|
|
|
3. **Configure OAuth Consent Screen**:
|
|
|
|
- If this is your first time creating a client ID, configure your consent screen by clicking **Consent Screen**.
|
|
|
|
- Fill in the necessary details and under **Authorized domains**, add the domain where your Formbricks instance is hosted.
|
|
|
|
4. **Create OAuth 2.0 Client IDs**:
|
|
|
|
- Select the application type **Web application** for your project and enter any additional information required.
|
|
|
|
- Ensure to specify authorized JavaScript origins and authorized redirect URIs.
|
|
|
|
```{{ Redirect & Origin URLs
|
|
Authorized JavaScript origins: {WEBAPP_URL}
|
|
Authorized redirect URIs: {WEBAPP_URL}/api/auth/callback/google
|
|
```
|
|
|
|
- **Update Environment Variables in Docker**:
|
|
|
|
- To integrate the Google OAuth, you have two options: either update the environment variables in the docker-compose file or directly add them to the running container.
|
|
|
|
- In your Docker setup directory, open the `.env` file, and add or update the following lines with the `Client ID` and `Client Secret` obtained from Google Cloud Platform:
|
|
|
|
- Alternatively, you can add the environment variables directly to the running container using the following commands (replace `container_id` with your actual Docker container ID):
|
|
|
|
```sh Shell commands
|
|
docker exec -it container_id /bin/bash
|
|
export GOOGLE_CLIENT_ID=your-client-id-here
|
|
export GOOGLE_CLIENT_SECRET=your-client-secret-here
|
|
exit
|
|
```
|
|
|
|
```sh env file
|
|
GOOGLE_CLIENT_ID=your-client-id-here
|
|
GOOGLE_CLIENT_SECRET=your-client-secret-here
|
|
```
|
|
|
|
1. **Restart Your Formbricks Instance**:
|
|
|
|
- **Note:** Restarting your Docker containers may cause a brief period of downtime. Plan accordingly.
|
|
|
|
- Once the environment variables have been updated, it's crucial to restart your Docker containers to apply the changes. This ensures that your Formbricks instance can utilize the new Google OAuth configuration for user authentication. Here's how you can do it:
|
|
|
|
- Navigate to your Docker setup directory where your `docker-compose.yml` file is located.
|
|
|
|
- Run the following command to bring down your current Docker containers and then bring them back up with the updated environment configuration:
|
|
|
|
### Microsoft Entra ID (Azure Active Directory) SSO OAuth
|
|
|
|
Do you have a Microsoft Entra ID Tenant? Integrate it with your Formbricks instance to allow users to log in using their existing Microsoft credentials. This guide will walk you through the process of setting up an Application Registration for your Formbricks instance.
|
|
|
|
#### Requirements
|
|
|
|
- A Microsoft Entra ID Tenant populated with users. [Create a tenant as per Microsoft's documentation](https://learn.microsoft.com/en-us/entra/fundamentals/create-new-tenant).
|
|
|
|
- A Formbricks instance running and accessible.
|
|
|
|
- The callback URI for your Formbricks instance: `{WEBAPP_URL}/api/auth/callback/azure-ad`
|
|
|
|
#### Creating an App Registration
|
|
|
|
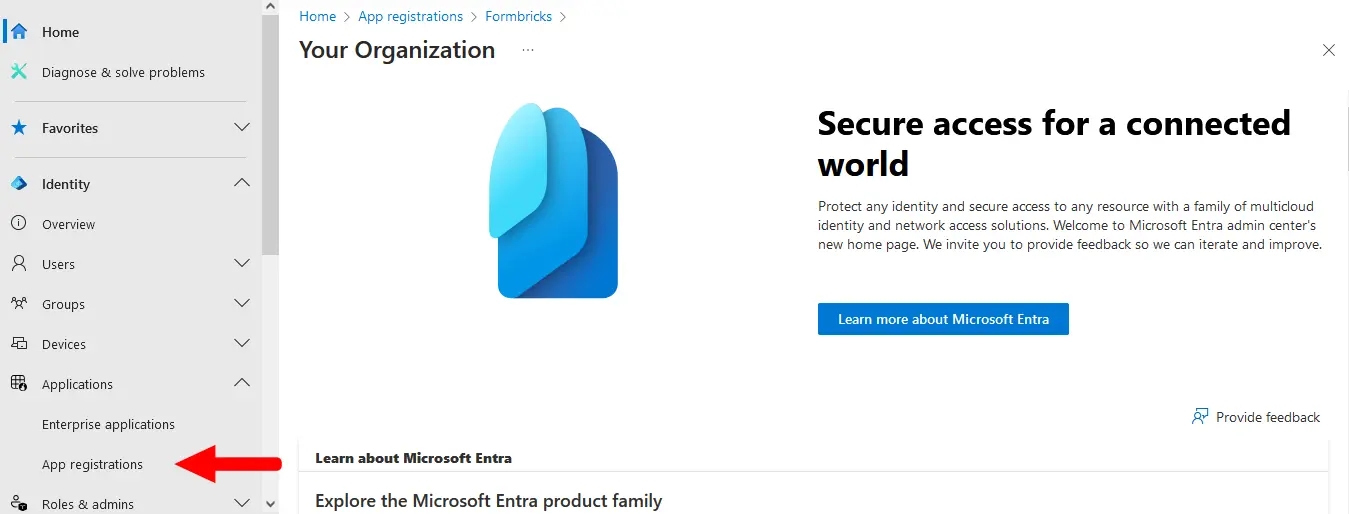
- Login to the [Microsoft Entra admin center](https://entra.microsoft.com/).
|
|
|
|
- Go to **Applications** > **App registrations** in the left menu.
|
|
|
|
|
|
|
|
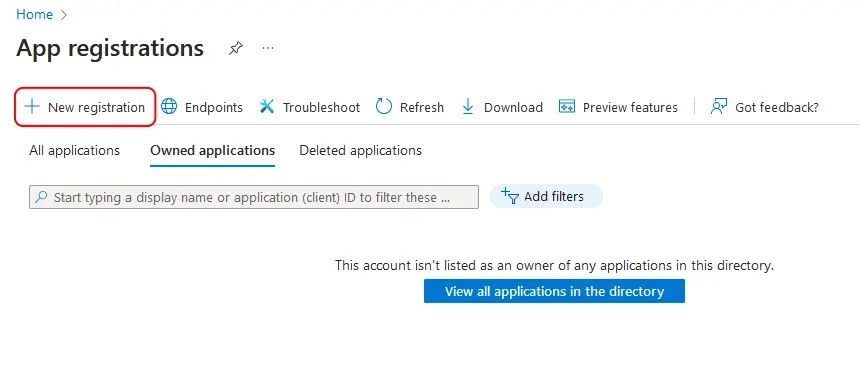
- Click the **New registration** button at the top.
|
|
|
|
|
|
|
|
- Name your application something descriptive, such as `Formbricks SSO`.
|
|
|
|

|
|
|
|
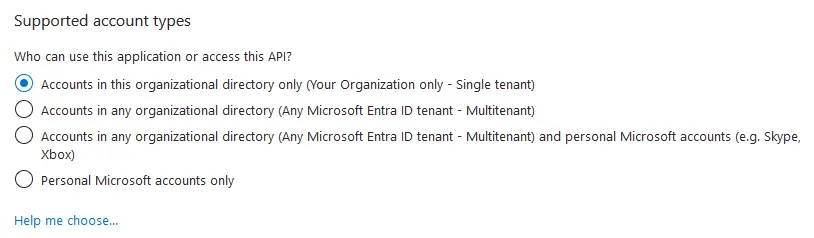
- If you have multiple tenants/organizations, choose the appropriate **Supported account types** option. Otherwise, leave the default option for _Single Tenant_.
|
|
|
|
|
|
|
|
- Under **Redirect URI**, select **Web** for the platform and paste your Formbricks callback URI (see Requirements above).
|
|
|
|

|
|
|
|
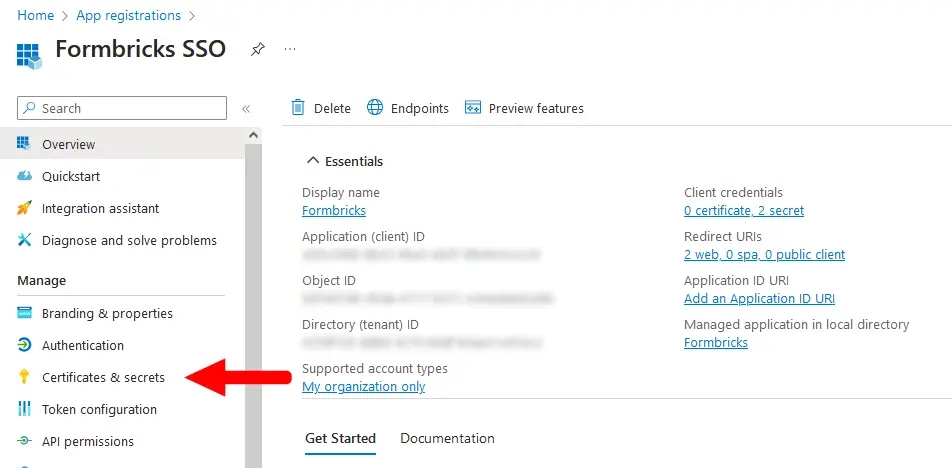
- Click **Register** to create the App registration. You will be redirected to your new app's _Overview_ page after it is created.
|
|
|
|
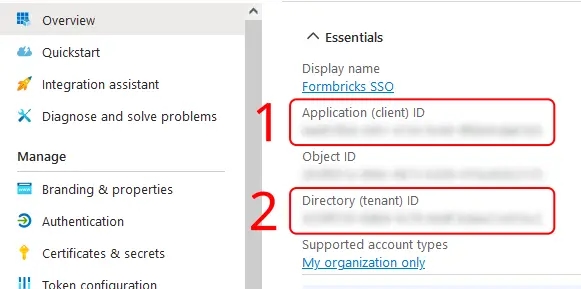
- On the _Overview_ page, under **Essentials**:
|
|
|
|
- Copy the entry for **Application (client) ID** to populate the `AZUREAD_CLIENT_ID` variable.
|
|
|
|
- Copy the entry for **Directory (tenant) ID** to populate the `AZUREAD_TENANT_ID` variable.
|
|
|
|
|
|
|
|
- From your App registration's _Overview_ page, go to **Manage** > **Certificates & secrets**.
|
|
|
|
|
|
|
|
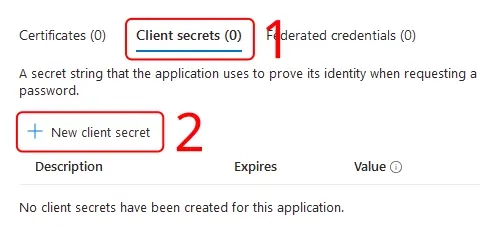
- Make sure you have the **Client secrets** tab active, and click **New client secret**.
|
|
|
|
|
|
|
|
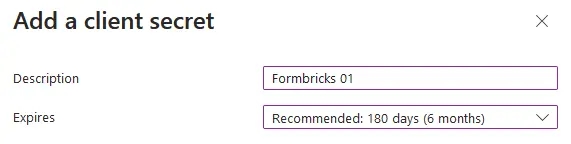
- Enter a **Description**, set an **Expires** period, then click **Add**.
|
|
|
|
<Note>
|
|
You will need to create a new client secret using these steps whenever your chosen expiry period ends.
|
|
</Note>
|
|
|
|
|
|
|
|
- Copy the entry under **Value** to populate the `AZUREAD_CLIENT_SECRET` variable.
|
|
|
|
<Note>
|
|
Microsoft will only show this value to you immediately after creation, and you will not be able to access it again. If you lose it, simply start from step 9 to create a new secret.
|
|
</Note>
|
|
|
|

|
|
|
|
- Update these environment variables in your `docker-compose.yml` or pass it like your other environment variables to the Formbricks container.
|
|
|
|
<Note>
|
|
You must wrap the `AZUREAD_CLIENT_SECRET` value in double quotes (e.g., "THis~iS4faKe.53CreTvALu3"`) to prevent issues with special characters.
|
|
</Note>
|
|
|
|
An example `.env` for Microsoft Entra ID in Formbricks would look like:
|
|
|
|
```yml Formbricks Env for Microsoft Entra ID SSO
|
|
AZUREAD_CLIENT_ID=a25cadbd-f049-4690-ada3-56a163a72f4c
|
|
AZUREAD_TENANT_ID=2746c29a-a3a6-4ea1-8762-37816d4b7885
|
|
AZUREAD_CLIENT_SECRET="THis~iS4faKe.53CreTvALu3"
|
|
```
|
|
|
|
- Restart your Formbricks instance.
|
|
|
|
- You're all set! Users can now sign up & log in using their Microsoft credentials associated with your Entra ID Tenant.
|
|
|
|
## OpenID Configuration
|
|
|
|
Integrating your own OIDC (OpenID Connect) instance with your Formbricks instance allows users to log in using their OIDC credentials, ensuring a secure and streamlined user experience. Please follow the steps below to set up OIDC for your Formbricks instance.
|
|
|
|
- Configure your OIDC provider & get the following variables:
|
|
|
|
- `OIDC_CLIENT_ID`
|
|
|
|
- `OIDC_CLIENT_SECRET`
|
|
|
|
- `OIDC_ISSUER`
|
|
|
|
- `OIDC_SIGNING_ALGORITHM`
|
|
|
|
<Note>
|
|
Make sure the Redirect URI for your OIDC Client is set to `{WEBAPP_URL}/api/auth/callback/openid`.
|
|
</Note>
|
|
|
|
- Update these environment variables in your `docker-compose.yml` or pass it directly to the running container.
|
|
|
|
An example configuration for a FusionAuth OpenID Connect in Formbricks would look like:
|
|
|
|
|
|
```yml Formbricks Env for FusionAuth OIDC
|
|
OIDC_CLIENT_ID=59cada54-56d4-4aa8-a5e7-5823bbe0e5b7
|
|
OIDC_CLIENT_SECRET=4f4dwP0ZoOAqMW8fM9290A7uIS3E8Xg29xe1umhlB_s
|
|
OIDC_ISSUER=http://localhost:9011
|
|
OIDC_DISPLAY_NAME=FusionAuth
|
|
OIDC_SIGNING_ALGORITHM=HS256
|
|
```
|
|
|
|
|
|
- Set an environment variable `OIDC_DISPLAY_NAME` to the display name of your OIDC provider.
|
|
|
|
- Restart your Formbricks instance.
|
|
|
|
- You're all set! Users can now sign up & log in using their OIDC credentials.
|